In my classroom, I have a lot of materials on rings. Sight words. Fluency sentences. You name it, I probably have it on a ring! But I didn’t have a way to put them out. They would sit in a drawer and the students would rarely use them.
While scrolling on Pinterest, I saw a picture that triggered an idea! I started to describe it to my (amazing) husband and his response was “That’s easy. We could do it now if you want.” Of course, I said (or maybe shouted) “Yes!!”.
Side Note: It amazes me how my husband’s brain works. Watching him work always reminds me that going to college doesn’t make you smart. My husband got his G.E.D. and then went to Motorcycle Mechanics Institute (a trade school). The way his brain can figure things out simply by looking at it is amazing! I remember this as I have conversations with my students about what they want to be when they are older.
Okay, back to the project!
I am going to explain this more as a tutorial so that if any of you want to recreate this, you can.
First, we went to Home Depot and bought the following:
• 2- 2X2X8 pieces of wood
• 1- 1X4X8 piece of wood
• 1- 4X2 piece of Pegboard
Note: My husband already had wood glue, a miter saw, and a nail gun with both nails and staples.
Second, we built the frame that would go around the outside of the pegboard. We took one of the 2X2X8 pieces of wood and cut it in half (creating a 2X2X4). Then we took the other 2X2X8 piece of wood and cut it to fit between the two 2X2X4 pieces. (Sorry, you’ll have to measure that cut.)
Third, we took our four cuts of wood and made the frame. We put wood glue between the two pieces then used the nail gun to nail them into place. We did this four times to create a frame.
Fourth, we created the legs that would hold the pegboard at a slight angle. We took the 1X4X8 and made two legs. On one side of the leg we made a 45 degree cut and on the other side we made a 22.5 degree cut using the miter saw.
Using the leg pieces we just cut, we placed the 45 degree side against the frame and the 22.5 degree side on the ground. After checking the alignment, I applied the wood glue on the 45 degree side of the leg and pressed it onto the frame then my husband used the nail gun to finish attaching it. We then repeated these steps for the leg the other side.
We let the frame sit for a bit so that all the wood glue dried.
Optional: After the frame dried, I decided to paint the frame before attaching the pegboard. I used a gray BEHR Satin Exterior paint.
Finally, we attached the 2X4 piece of pegboard. With the frame standing, I held the pegboard onto the frame while my husband used a nail gun loaded with staples to staple around the edge (so that the staples went through the pegboard into the square frame).
My husband decided to use staples instead of nails when attaching the pegboard so that the nails didn’t go through the pegboard.
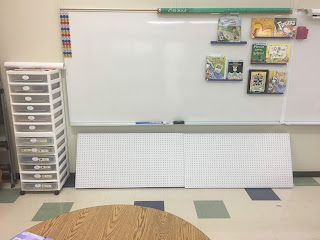
Here is how it sits in my classroom
I am waiting for my peg hooks to come in so I can hang stuff on them. I'm so excited with how these turned out!


